Specification
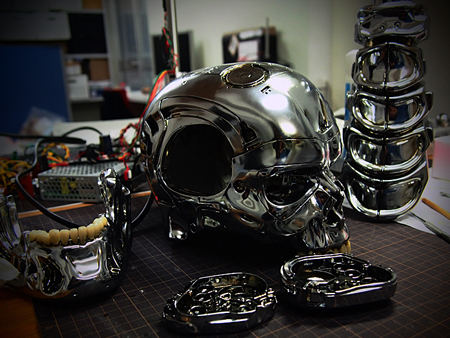
The base kit M1endoskull kit
 M1endoskull kit
 M1endoskull kit
-
M1endoskull kit
-
M1endoskull kit
-
M1endoskull kit
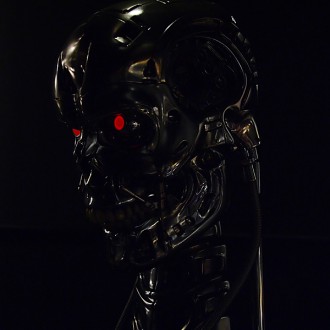
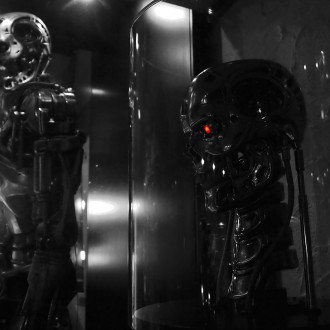
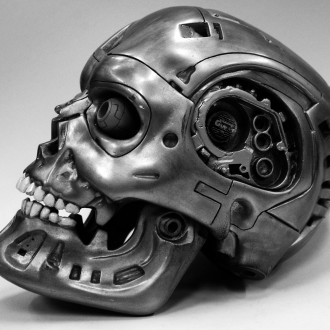
This soft vinyl kit was released by T1 three years after the release of Terminator 2.
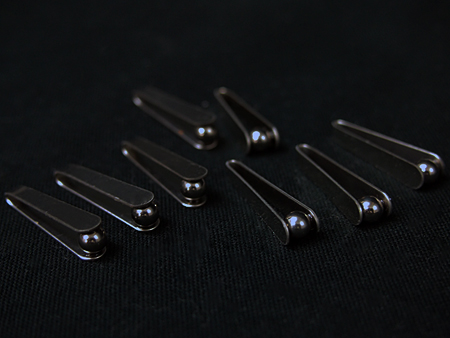
Molding and remodelingBased on the Endoskull from the original “The Terminator” movie, I have made the following changes.- Recreate the lens with a transparent resin
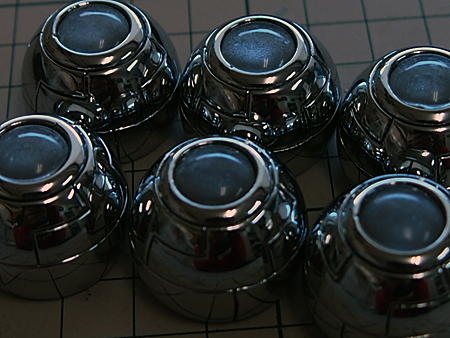
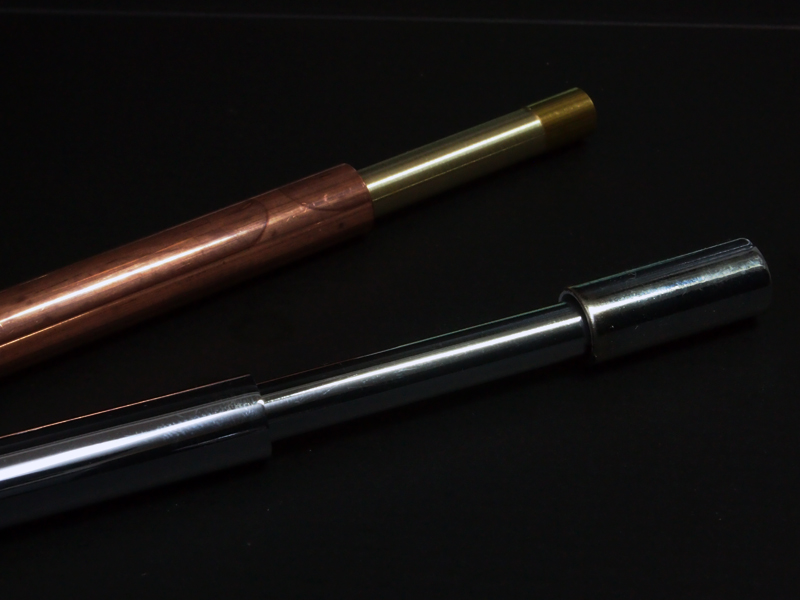
- Created the cylinder behind the head from scratch with brass
- Adding a groove in the front of the cervical spine piece, created from scratch referring to the spine from the M1 kit
I have also added the details below.- Created the cervical spine based off of an Endoskeleton prop from T2
- Carved out four grooves on the side of the skull
- Exchange teeth to acrylic fake teeth
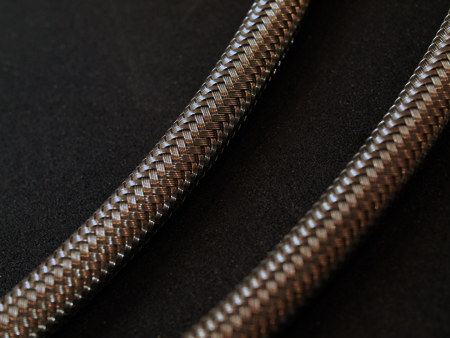
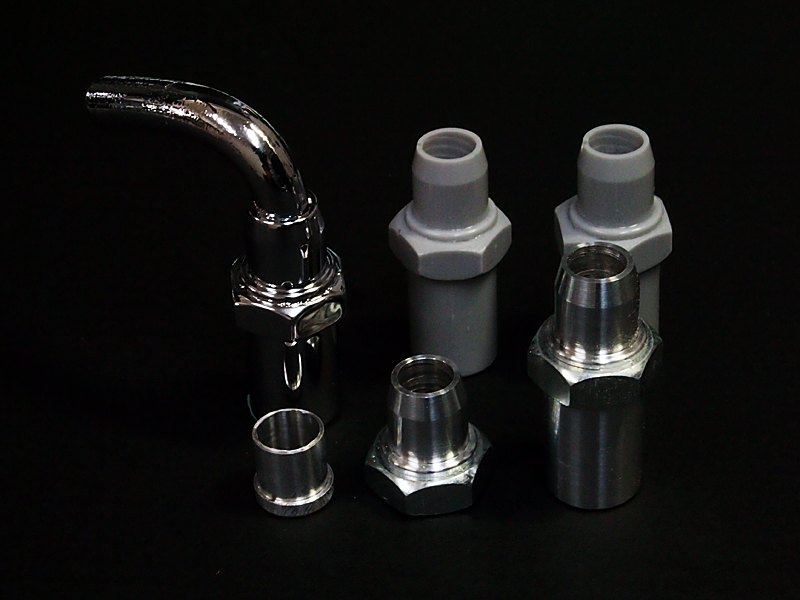
- Use a brake hose for the oil line on the side of the head, and create a connector piece from scratch
- Recreate the lens with a transparent resin
- Created the cylinder behind the head from scratch with brass
- Adding a groove in the front of the cervical spine piece, created from scratch referring to the spine from the M1 kit
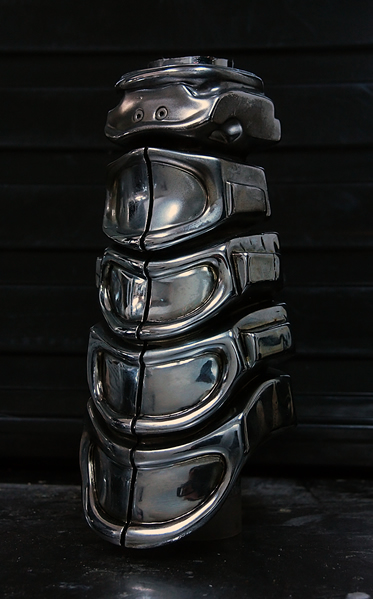
- Created the cervical spine based off of an Endoskeleton prop from T2
- Carved out four grooves on the side of the skull
- Exchange teeth to acrylic fake teeth
- Use a brake hose for the oil line on the side of the head, and create a connector piece from scratch

Chrome plating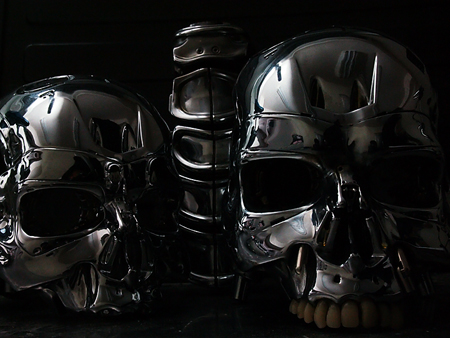 six-layer chrome plating
 six-layer chrome plating
-
six-layer chrome plating
-
six-layer chrome plating
The easier “vacuum metalizing” plating had its cons in texture, color, and longevity, so I opted for “six-layer chrome plating”. This method costs more money and time, and requires certain level of skill. I asked one of the best chrome plating factories to do the job.
Animatronics
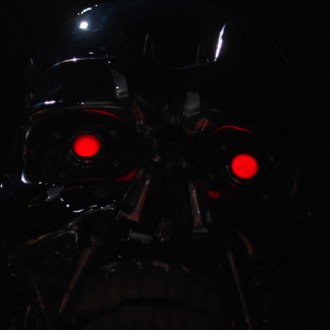
The most distinctive feature of this replica is the “head movement”, but I put delicate attention to the details. I had two themes for the design of the robot mechanism.
- Don’t make the movement look awkward
- Don’t make the movement look too smooth
There are several reasons why I had these somewhat paradoxical themes.
First, to “add mechanical movement to a life-size object” requires more precision than a smaller scaled model and makes it easier to find if you had cut corners, and any strange movement would be a let-down, which would go against the whole concept of this project.
At the same time, if the model moved too smoothly, it would surpass the “not-so-perfect” animatronics technology used in the original movie, and would take away the “cold terror of the Endoskeleton chasing Kyle and Sarah in the factory”. Based on the two themes, I have chosen which motors and ball bearings to use, and designed the mechanics. There is nothing that would make me happier if you could understand the thoughts and efforts I have put into the Animatronic Bust .
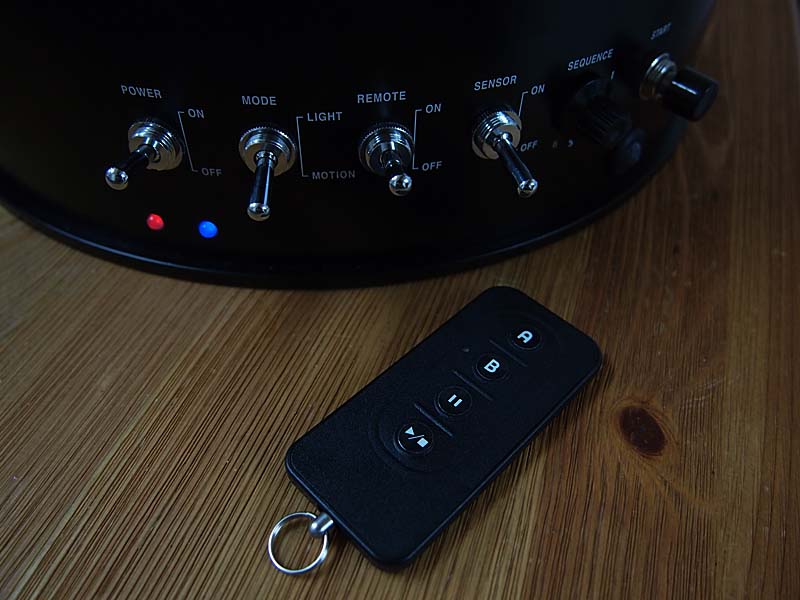
Control switchsTYPE-1 (Animatronic Bust ver.2.1)
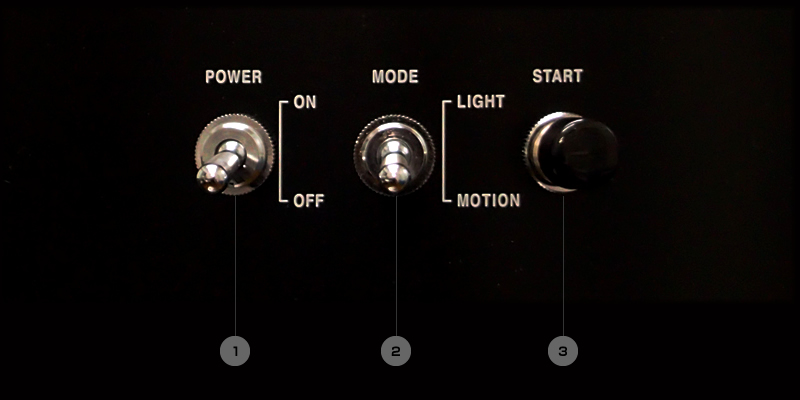
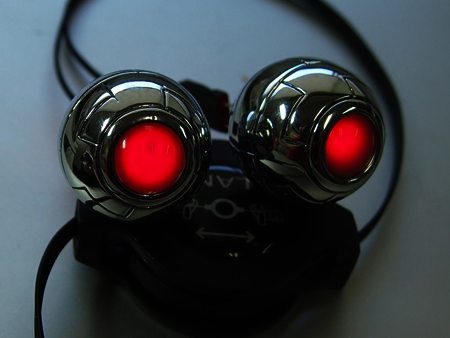
Power Switch Once powered on the Animatronic Bust will reposition itself to its default position MODE Switch When in LIGHT mode, the eyes illuminate. The START switch will not function in this mode.
When switched to MOTION mode, the eye lights will turn off. START Button - By pushing the START button, the bust will begin the preprogrammed motion sequence once, and return back to its default position.
- By pressing the START button for two seconds during the motion sequence, the bust will terminate the motion sequence and return back to default position
Pilot Lamp Left Right Mode 

Power supplied but power switch turned off 
Power switch turned on but servomotors on standby 
Returning to default position (all switch operations invalid during this mode) Executing motion sequence 
CPU error. Turn power off and unplug/replug power plug to recover
TYPE-2 (Animatronic Bust ver.2.2/2.3)
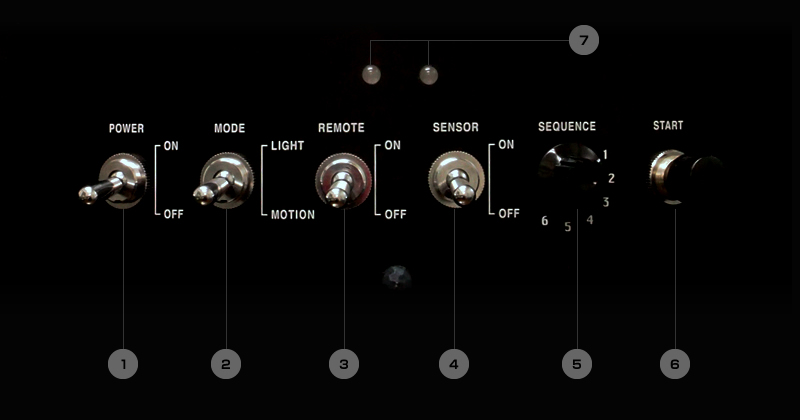
Power Switch Once powered on the Animatronic Bust will reposition itself to its default position MODE Switch When in LIGHT mode, the eyes illuminate. The REMOTE and SENSOR switches will not function in this mode.
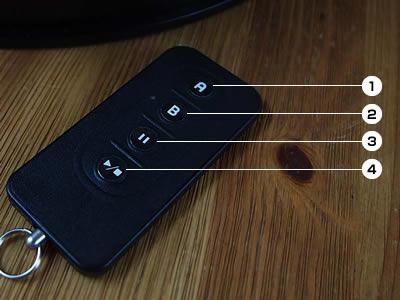
When switched to MOTION mode, the eye lights will turn off. REMOTE Switch Controlled by remote when turned on (START switch will not function) SENSOR Switch Will go into Sensor mode, ready to activate motion sequence in 20 seconds (standby). Once sensor detects motion, will start 25-second motion sequence in 5 seconds, and go back to standby. Eye lights will be turned on. Sequence Dial Can choose from 4 different motion sequences- Activate sequence A once
- Activate sequence B once
- Activate sequence A three times
- Activate sequence B three times
START Button - When MODE switch is set at MOTION, and REMOTE and SENSOR switches are turned off, the bust will begin the motion sequence selected by Sequence Dial, and return back to its default position.
- By pressing the START button for two seconds during the motion sequence, the bust will terminate the motion sequence and return back to default position
Pilot Lamp Left Right Mode Power supplied but power switch turned off Power switch turned on but servomotors on standby Returning to default position (all switch operations invalid during this mode) Executing motion sequence CPU error. Turn power off and unplug/replug power plug to recover 
Remote control mode standby 
Receiving remote control signals Preparing sensor mode (takes 20 seconds till sensor standby) Sensor mode standby
TYPE-1 (Animatronic Bust ver.2.1)
| Power Switch | Once powered on the Animatronic Bust will reposition itself to its default position | |||
|---|---|---|---|---|
| MODE Switch | When in LIGHT mode, the eyes illuminate. The START switch will not function in this mode. When switched to MOTION mode, the eye lights will turn off. | |||
| START Button |
| |||
| Pilot Lamp | Left | Right | Mode | |
| Power supplied but power switch turned off | ||||
| Power switch turned on but servomotors on standby | ||||
| Returning to default position (all switch operations invalid during this mode) | ||||
| Executing motion sequence | ||||
| CPU error. Turn power off and unplug/replug power plug to recover | ||||
TYPE-2 (Animatronic Bust ver.2.2/2.3)
| Power Switch | Once powered on the Animatronic Bust will reposition itself to its default position | ||
|---|---|---|---|
| MODE Switch | When in LIGHT mode, the eyes illuminate. The REMOTE and SENSOR switches will not function in this mode. When switched to MOTION mode, the eye lights will turn off. | ||
| REMOTE Switch | Controlled by remote when turned on (START switch will not function) | ||
| SENSOR Switch | Will go into Sensor mode, ready to activate motion sequence in 20 seconds (standby). Once sensor detects motion, will start 25-second motion sequence in 5 seconds, and go back to standby. Eye lights will be turned on. | ||
| Sequence Dial | Can choose from 4 different motion sequences
| ||
| START Button |
| ||
| Pilot Lamp | Left | Right | Mode |
| Power supplied but power switch turned off | |||
| Power switch turned on but servomotors on standby | |||
| Returning to default position (all switch operations invalid during this mode) | ||
| Executing motion sequence | |||
| CPU error. Turn power off and unplug/replug power plug to recover | |||
| Remote control mode standby | ||
| Receiving remote control signals | ||
| Preparing sensor mode (takes 20 seconds till sensor standby) | |||
| Sensor mode standby | |||